-
Ndjeshmërisë Ekspresive Dhe Forcës Kromatike Në Portretin E Vitit 1984
 3 hours ago
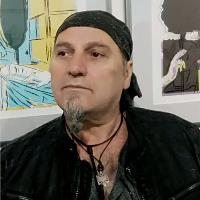
Shefqet Avdush Emini, Holandë - Orfeu.AL
Shefqet Avdush Emini
NDJESHMËRISË EKSPRESIVE DHE FORCËS KROMATIKE NË PORTRETIN E VITIT 1984
Në botën e artit bashkëkohor, pak janë ata artistë që kanë ditur të krijojnë një gjuhë vizuale unike e të pashoqe, që jo vetëm i mbijetojnë kohës, por e sfidojnë atë. Shefqet Avdush Emini, një nga emrat m&e . . .
-
Shefqet Avdush Emini – The Icon Of Abstract Expressionism And The Portrait Of The Human Soul
3 hours ago
Shefqet Avdush Emini – The Icon of Abstract Expressionism and the Portrait of the Human Soul Translated into Arabic by Poet and translator Lebanese-Brazilian TAGHRID BOU MERHI
Shefqet Avdush Emini – The Icon of Abstract Expressionism and the Portrait of the Human Soul
Translated into Arabic by Poet and translator Lebanese-Brazilian TAGHRID BOU MERHI
In the pantheon of contemporary international artists, Shefqet Avdush Emini holds a unique place as a creator w . . .
-
Animation Is A Successful Career Option After 12th? Graphic Designing
 12 hours ago
Animation is one of the most lucrative courses these days and also you get attractive salaries by doing animation. The main thing is that you join animation courses after 12th with any stream like science, commerce and Arts. In Today World, Animation is a successful career option after 12th? for the students because from office to films everywhere there is a huge demand for good and skills animators. You can do Graphic Designing, Web Designing, Interior Designing, 3D-Max, Game Engine and . . .
-
Shefqet Avdush Emini’s Visual Language: Emotion, Expression, And Identity
 6 days ago
Introduction
Shefqet Avdush Emini is a well-known modern painter whose art transcends cultural and geographical limits. Known for his bold, emotional brushwork and expressive forms, Emini has created a strong visual language that speaks directly to the human soul. His artworks are not just creative expressions but also represent his personal experiences, emotional depth, and cultural background. Using color, texture, and symbolism, he explores complex themes of identity, memory, and the hum . . .
-
Shefqet Avdush Emini Në Sarajevë: Identiteti Krijues
1 month ago
Shefqet Avdush Emini në Sarajevë: Identiteti krijues si akt universal përballë kujtesës së një qyteti të plagosur
Në fotografinë e realizuar gjatë Simpoziumit Ndërkombëtar në Sarajevë, Bosnje, shfaqet artisti i mirënjohur ndërkombëtarisht, Shefqet Avdush Emini, në një akt të thellë të përqendrimit krijues, përballë kanavacave të mbushura me ngjyrë, en . . .
-
Shefqet Avdush Emini Është Një Nga Artistët Më Të Shquar Bashkëkohorë, Me Një Ndikim Të Jashtëzakonshëm Në Artin Ndërkombëtar
4 months ago
=
Shefqet Avdush Emini është një nga artistët më të shquar bashkëkohorë, me një ndikim të jashtëzakonshëm në artin ndërkombëtar. Ai ka krijuar një stil unik ekspresiv, të fuqishëm dhe emocional, i cili e ka bërë të njohur në mbarë botën. Me ekspozita në të gjitha kontinentet dhe vlerësime të shumta nga kritikët më të njohur të artit, S . . .
-
Shefqet Avdush Emini, Është Një Portret Ekspresiv I Krijuar Me Një Qasje Unike Dhe Një Stil Të Dallueshëm,
4 months ago
Zemra Shqiptare
SHQIP
Kjo pikturë e realizuar nga artisti i njohur ndërkombëtarisht, Shefqet Avdush Emini, është një portret ekspresiv i krijuar me një qasje unike dhe një stil të dallueshëm, i cili karakterizohet nga ngjyra të guximshme, kontraste të forta dhe lëvizje të lirshme të penelit.
Portreti paraqet një figurë mashkullore, fytyra e së cilës është ndërtuar me nua . . .
-
Shefqet Avdush Emini Vazhdon Të Frymëzojë Dhe Të Magjepsë Me Krijimtarinë E Tij
4 months ago
INTERNATIONAL ART SYMPOSIUM URFA, TURKEY 2015
(Shfaqet një foto e artistit Shefqet Avdush Emini pranë një pikture të tij)
Shefqet Emini with Shefqet Avdush Emini. 1 January 2015 ·
INTERNATIONAL ART SYMPOSIUM URFA, TURKEY 2015 ARTIST: SHEFQET AVDUSH EMINI http://www.mastersoftoday.com/mot/artists.htm
http://shefqetavdushemini.see.me/
Komente: Hagop Hrant Sulahian: My dear friend Shefqet your work shines as always. Shefqet Emini replied - 1 Rep . . .
-
Shefqet Avdush Emini Is Een Van De Meest Vooraanstaande Figuren In De Hedendaagse Kunst, Een Meester In De Schilderkunst
4 months ago
NEDERLANDS
Shefqet Avdush Emini is een van de meest vooraanstaande figuren in de hedendaagse kunst, een meester in de schilderkunst die een onuitwisbare invloed heeft achtergelaten in de internationale kunstwereld. Met een unieke stijl en een diepe emotionele expressie heeft hij werken gecreëerd die direct tot de ziel van de toeschouwer spreken, gevoelens en passie overbrengen en een zeldzame esthetische gevoeligheid uitstralen.
Zijn Meesterschap in de Kunst
Zijn schilderijen w . . .
-
Shefqet Avdush Emini Është Një Nga Figurat Më Të Ndritura Të Artit Bashkëkohor, Një Mjeshtër I Pikturës Që Ka Lënë Një Ndikim Të Pashlyeshëm Në Botën E Artit Ndërkombëtar.
4 months ago
Shefqet Avdush Emini është një nga figurat më të ndritura të artit bashkëkohor, një mjeshtër i pikturës që ka lënë një ndikim të pashlyeshëm në botën e artit ndërkombëtar. Me një stil unik dhe një shprehje emocionale të thellë, ai ka arritur të krijojë vepra që flasin drejtpërdrejt me shpirtin e shikuesit, duke transmetuar ndjenja, pa . . .
|
|