When it comes to uploading artworks, we've noticed that some artists upload sub-standard quality images. Although we give you the tools necessary to set up your online portfolio, it doesn't mean that you can set up a successful portfolio by just dumping every image from your computer. When it comes to uploading your artwork images, you MUST prepare them in advance before uploading. Sometimes all you need is a basic photo editing software that comes standard with most Operating Systems (e.g. Windows Paint).
So let's take a quick look and see what you should and should not do. Customers expect quality and no matter how good our print quality is, you'd be shooting yourself in the foot by uploading unprepared images.


Do not upload images that have bad lighting, images taken with a low megapixel camera or scanned with a low quality scanner. Make sure that the lighting is well adjusted ( i.e. not too bright , not too dark , no uneven lighting, no visible camera flash, etc). Also make sure that there are no compression artifacts ( blocky, grainy image) and the image quality is as good as it can be.

Do not upload photos of your original artwork with frames. Make sure that there are no visible
external objects in the image ( frame, floor, wall, hands holding the original artwork, etc). This is especially true if you plan on participating in our Print-On-Demand program. Would you, as a customer, purchase a canvas print of an artwork that shows frames or other external objects within the image?

Crop your artwork images, get rid of arbitrary borders and fix any distortions that occurred from a poorly positioned camera. We've noticed a number of artists make this mistake. Cropping an image should be fairly easy with a photo editing software. Even if you're not computer savvy, ask a friend to help you out. No one wants their prints to be of a crooked image or contain some random borders around the image. Professionalism is the key.


This is the correct way an image should look before an upload. As you can see the contrast, brightness and all the miscellaneous problems have been fixed. Even if you're trying to sell originals with frames and you won't be participating in the print on demand program, your profile page will appear clean and professional to a customer. You can email full (framed) shots of the original to an interested party in a future communication.
Finally, we have a few other recommendations to make.
- Work with loss-less image formats such as .PNG, .TIFF, Bitmap .BMP and Photoshop .PSD files. This will ensure that there's no quality loss when you modify an image, come back the next day, work and save it again.
- When your image is finally ready for an upload, save it as a maximum quality JPG (12 for Photoshop). This will make your image quality good enough for printing and the small file size offered by the JPG compression will ensure faster uploads.
- Do NOT artificially increase the PPI (pixels per inch) of your images. If you scanned it at 200 DPI or your 12 megapixel camera sets the resolution of your image at 96 DPI by default, then increasing the image resolution will only make the file size bigger without much quality improvement. If necessary, we can manually increase the DPI (Dips Per Inch) of your image before printing.
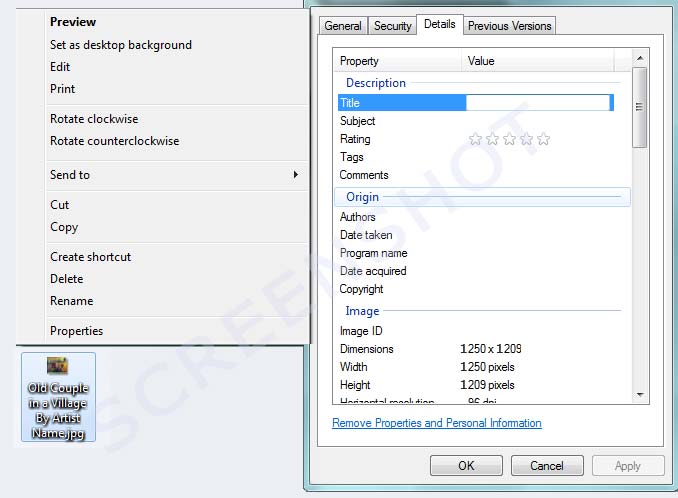
- Set your image MetaData before uploading. To do so, Right Click on an image >> goto Properties, then select the Details tab.
To make adding artworks easier, set the Title, Tags, Comments (Description), Author (Artist Name) and Date Taken (Original Create Date) information on each one of your images. Got Artwork will pull this information and automatically pre-fill the corresponding fields from your image. If you're participating in other artist community websites, some of them might support this feature as well. See the screenshot below for reference.